Workflow Builder
Draw what should happen: drag nodes onto the canvas, wire them together,
configure each one, test it, and save it. The saved .wf file is what an
integration attaches to.
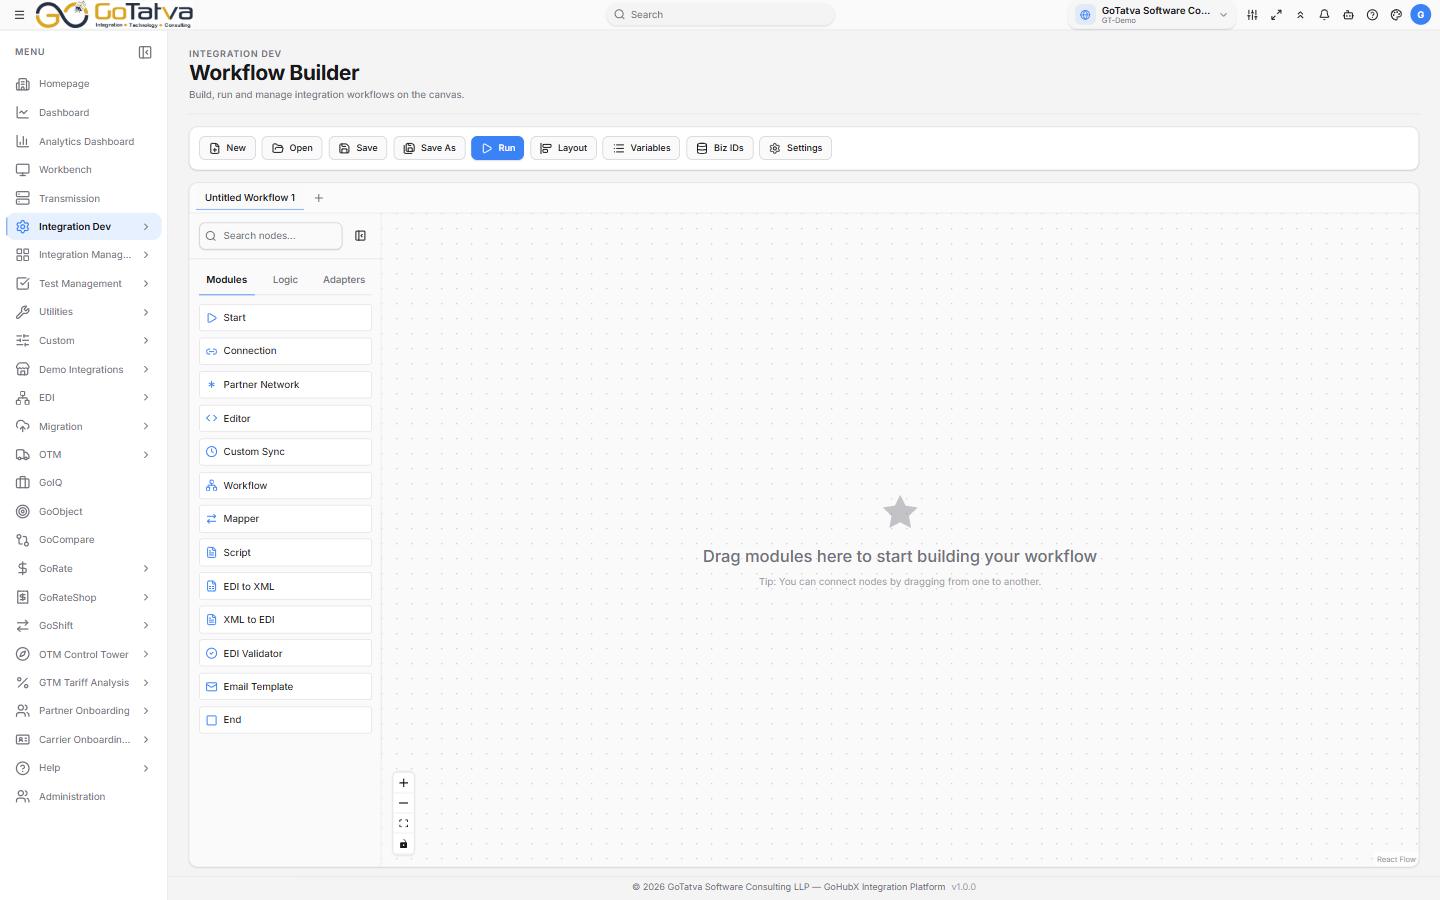
The node palette on the left, the canvas in the middle, the toolbar above.
The palette
Three tabs, and a search box across all of them.
Modules - the building blocks: Start, Connection, Partner Network, Editor, Custom Sync, Workflow, Mapper, Script, EDI to XML, XML to EDI, EDI Validator, Email Template, End.
Logic - how the flow branches: Branch, Route, Cleanse, Decision, Split, Exception, Stop, Return Documents, Flow Control, Business Rules, Try/Catch.
Adapters - a node per connected system, from SAP and Oracle through the TMS and carrier systems to messaging and HR platforms.
Building
Drag a node onto the canvas, then drag from one node to another to connect them. Click a node to open Configure on the right - the panel differs per node type.
Hovering a node gives you Copy, Description and Remove.
Layout tidies the canvas automatically, left to right.
They mark where the flow begins and ends. Test input is supplied in the Run dialog, not on the Start node.
Decisions
A Decision node routes the flow by condition. Each condition compares a
value - a path in the payload, a fixed value or a global variable - using
==, !=, >, <, >=, <=, Contains, Starts With or Is Empty.
First Match Wins takes the first matching branch; Execute All Matches takes every one. The Else path catches everything unmatched.
An unconfigured Decision shows Conditions not configured in red, and the workflow will not save until it is fixed.
Splitting
A Split node fans one message out into many - by JSON Path, XML Path, a Delimiter, or a script.
Variables and IDs
Variables holds the workflow's global variables - name, type, default and description. Script and mapper variables appear on their own tabs, read-only, because they come from the nodes themselves.
Biz IDs defines the business identifiers that let someone find this transaction later by order number or reference, rather than by internal ID.
Settings
Settings covers this workflow only: which log levels to record (Error and Warning are always on), timeout, retry attempts, parallel execution limit and result caching, and who gets notified on success, error or warning.
Testing
Run opens Test Workflow Input. Choose JSON, Text, XML or CSV, paste or upload your input, and Run. The result comes back as Status: Success or Status: Failure with the output beside it.
The test executes the canvas as it stands. Save the workflow and run it through its integration before treating the result as final.
Saving
Save writes to the current file; Save As creates a new one. Workflows live under the project's User Object folder in Resources.
A workflow will not save until it has a Start node, an End node, and every Decision condition - including Else - wired to something.
Tabs across the top hold several workflows at once. A dot on a tab means unsaved changes.